6-Volt to 12-Volt Conversion Leave a comment
6-Volt to 12-Volt Conversion: A Complete DIY Guide for Classic Vehicles
Back in the day, your ride didn’t need much: just a 6-volt battery, a set of headlights, and maybe a working horn if you were lucky. But times change. And if you’re still running a stock 6-volt system, you’re basically cruising into modern traffic with a flashlight and a dream. That’s why a 6-volt to 12-volt conversion is practically a rite of passage for anyone serious about keeping their classic on the road and out of the stone age.
In this guide, we’ll walk through everything: the parts, the wiring, the common screw-ups, and even how to handle delicate components like gauges using a 6V to 12V converter. So roll up your sleeves. You’re about to take your electrical system from museum piece to street-ready.


Why Bother with a 6-Volt to 12-Volt Conversion?
Look, if you love the original 6-volt system because it’s “period correct,” that’s fine; nostalgia is a hell of a drug. But if you’ve ever tried to start your classic after it’s been sitting for a week and got nothing but a sad rrr-rrr and the faint smell of electrical despair, you already know: that old setup isn’t cutting it.
Upgrading to 12 volts means more than just brighter headlights (though yes, you’ll finally see the road instead of a murky suggestion of it). It means your starter actually cranks, your ignition system has a reliable spark, and you can run modern accessories—like GPS, sound systems, or even a backup camera—without wiring in a rat’s nest of reducers and adapters.
It also boosts safety and drivability. Ever try signaling a lane change with 6V turn signals in broad daylight? You might as well wave. Converting to 12 volts brings your car in line with modern expectations, without losing the soul of the build.
What You’ll Need for the Job
This isn’t just a swap-the-battery-and-hope kind of project. A proper 6-volt to 12-volt conversion means thinking ahead and rounding up the right components, because the last thing you want is to fry your gauges or sit in the driveway, cursing at a half-lit tail light.
Here’s your essential toolkit for going from antique juice to full 12V glory:
12V Battery
Obvious, but let’s not skip the basics. A Group 24 or 35 battery is a solid choice depending on your space. Check fitment before you commit.
12V Alternator or Generator
Whether you’re going with a one-wire alternator or converting your old generator, this is the muscle of your new system. Get a bracket that fits your engine; some mods may be needed if you’re working with a tight engine bay.
Light Bulbs & Fuses
Every 6V bulb in your system has to go. Tail lights, dash lights, turn signals, swap ’em all for 12V. Same for fuses. Don’t cheap out here; get modern replacements with clean contacts and proper amperage.
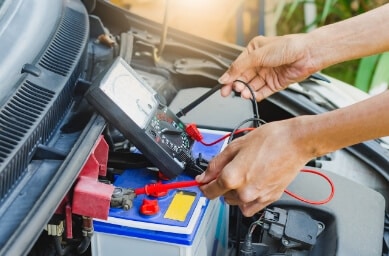
6V to 12V Converter
If you’re trying to keep those vintage gauges alive (and who isn’t?), you’ll need a solid 6-volt to 12-volt converter. These handy little devices step the voltage down so you don’t roast your fuel or temp gauges into oblivion.
Voltage Reducers/Resistors
Some accessories—like original wiper motors or radios—may not play nice with 12V. Reducers or ballast resistors can keep them running without melting.
Wiring Kit
Don’t trust brittle mystery wires from the Eisenhower era. You want a wiring kit that’s made for hot rods, not lawn mowers. This is where Watson’s StreetWorks comes in clutch. Our wiring kits are pre-labeled, well-insulated, and tailored for street-driven builds.
Basic Tools + 6-Volt to 12-Volt Conversion Diagram
Wire cutters, strippers, crimpers, a multimeter, patience, and a good wiring diagram (preferably one you didn’t print in 2004). A 6-volt to 12-volt conversion diagram can save you from the dark abyss of bad connections and burned-out hope.
Step-by-Step: How to Convert Your System
You’ve got your tools, parts, and confidence. Now let’s walk through the actual 6-volt to 12-volt conversion process. Whether you’re building in your garage, driveway, or spiritual safe space under a tarp, these steps will get your ride running 12 volts strong without setting it on fire.
Step 1: Disconnect and Strip Down
Start by disconnecting the battery. If you skip this step and get zapped, that’s on you. Remove the 6V battery, generator, and regulator. Label every wire: masking tape and a Sharpie now saves hours of “what-the-heck-does-this-go-to?” later.
Also, photograph everything for documentation.
Step 2: Replace the Charging System
Mount your new 12V alternator or generator with the correct bracket. If it’s a one-wire alternator, wiring is simple; run it to the battery or junction block. If it’s a three-wire, you’ll need to loop in the ignition and voltage sense wires. Keep everything tidy and avoid wire spaghetti.
Step 3: Upgrade Lighting and Bulbs
Swap out every 6V bulb with 12V equivalents: headlights, taillights, dash, dome, everything. Double-check socket conditions while you’re in there and replace fuses to match 12V amperage levels. Brittle old contacts are the electrical version of dry rot.
Step 4: Handle the Gauges
Gauges are sensitive little creatures. You need a 6V to 12V converter or a voltage reducer here. Mount it near your gauge cluster and connect carefully, then double-check polarity. Frying a factory temp gauge is the stuff of nightmares.
Step 5: Address the Starter and Ignition
Good news: many 6V starters can handle 12V short-term because they were overbuilt like tanks, just don’t crank it. You may need to swap or rewire the starter solenoid and ignition coil. Use a ballast resistor if you’re running points.
Step 6: Rewire with Quality Gear
If your wiring harness looks like it’s an original, replace it. We offer full kits with labeled wires, modern connectors, and enough length to route things right. Whether you’re rocking a bare firewall or a full custom harness, we’ve got you covered with clean routing and easy integration.
Our wiring kits also come with instructions that don’t assume you already know everything about electricity. That helps.
Step 7: Ground It Right
This is the step that separates the clean installs from the flickering disasters. Run proper grounds to the engine block, chassis, body panels, and key components. Clean off rust, paint, and old grease before grounding. 12V systems are pickier about bad grounds than 6V systems.

Wrapping Up: Fire It Up and Test
You’ve stripped, wired, crimped, swapped, and maybe cried a little. Now it’s time to fire it up and see if all that elbow grease actually did something.
Final Checklist Before Ignition:
- Battery installed (correct polarity).
- All grounds secured and corrosion-free.
- Light bulbs verified at 12V rating.
- 6V to 12V converter installed for gauges.
- Fuses double-checked; no overfusing to “be safe.”
- Alternator wired correctly, especially if it’s a one-wire.
- No loose or mystery wires.
First Start
Turn the key. Hear that? That’s the sound of progress. Your starter should crank fast, way faster than it did on 6V. If it sounds like it’s on speed and your gauges start twitching, you’re in the right ballpark.
Let it idle and monitor the voltage at the battery with a multimeter. You want to see something in the 13.8-14.2V range with the alternator running. If you see anything over 15V, shut it down and check your regulator setup.
Test All Systems
Before your first drive, take a moment to check that your systems are all working right:
- Lights: Bright and flicker-free? Check.
- Gauges: Moving smoothly? Congrats, your reducer didn’t explode.
- Horn: Loud enough? Good.
- Wipers: Not running at hyper-fast speeds? Bonus points.
The Victory Lap
Once it’s all working, go for a drive. Pay attention to how it starts, how the lights behave at idle, and whether anything smells like melted regrets. This is your moment. You’ve successfully pulled off a full 6-volt to 12-volt conversion.
Power Your Build the Right Way: Shop Watson’s StreetWorks
You’ve got the knowledge, you’ve got the project, and now you need the parts that won’t let you down. Watson’s StreetWorks isn’t just another supplier; we’re the secret behind thousands of successful builds. From full wiring kits to switch panels and the little details that separate a clean install from a hot mess, Watson’s has you covered. Every product is built with the DIYer in mind, using quality materials and common-sense design that makes your job easier, not harder.
Don’t roll the dice on generic parts. Shop the full selection at Watson’s StreetWorks and get gear that’s built to perform, made to last, and worthy of your ride.
Frequently Asked Questions: 6-Volt to 12-Volt Conversions
Still got questions before you start turning wrenches? Here are a few quick answers to the most common head-scratchers about the 6-volt to 12-volt conversion process.
Why were older vehicles originally built with 6-volt systems?
Back in the early days of motoring, 6-volt systems were enough to run the basic electrical needs of a car: headlights, a starter, maybe a tube radio if you were fancy. As vehicles evolved and required more power, the industry shifted to 12 volts for better reliability and performance.
Do I need to replace all the wiring during a 6-volt to 12-volt conversion?
Not always, but you probably should. While 6V wiring is typically heavier gauge, it’s also decades old and likely brittle, cracked, or corroded. Replacing it with a modern kit—like those from Watson’s StreetWorks—means fewer headaches and a system you can trust.
Are there any legal or registration implications with performing a 6V to 12V conversion?
Nope, a 6V to 12V conversion is generally seen as a safety and reliability upgrade, not a modification that affects legal compliance or registration. Just make sure any lighting or emissions-related changes still meet your local regulations.