How to Install a Push Button Start Kit In 8 Simple Steps Leave a comment
How to Install a Push Button Start Kit In 8 Simple Steps
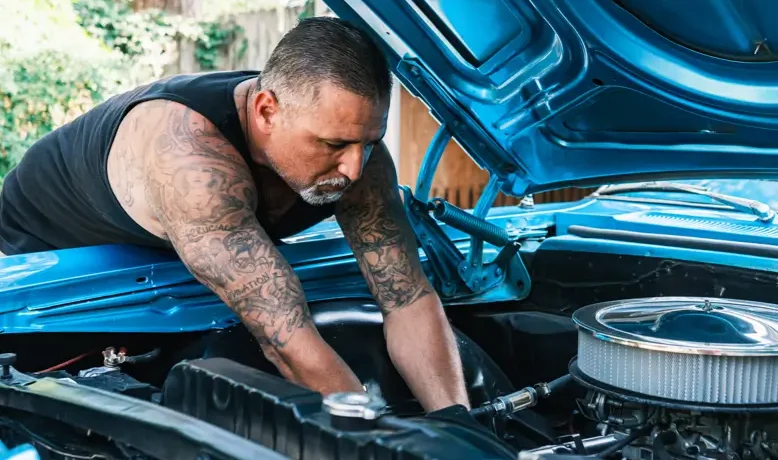
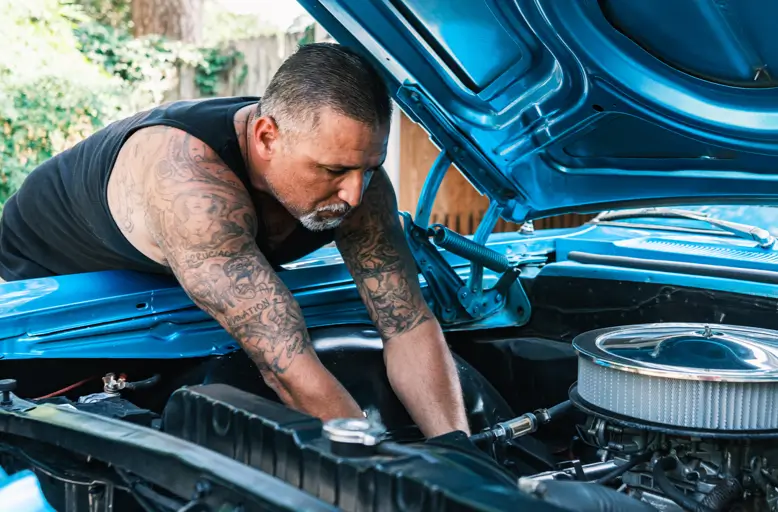
You’ve spent time and money getting your street rod dialed in—custom bodywork, a built motor, maybe even a fresh interior. But you’re still turning an old-school key like it’s 1965? Sounds like you need to install a push button start kit. After all, worn-out tumblers, busted keys, and finicky switches are just another headache you don’t need in your ride.
Whether you’re installing a push button start to clean up the dash, eliminate a worn-out ignition switch, or just because it looks flat-out cool, the process is straightforward if you know your way around wiring. In this guide, we’ll break down how to install and wire a push button start in a way that makes sense.


Step 1: Gather Your Gear
Before you start ripping out wires, make sure you’ve got everything you need. A push button start kit isn’t a complicated install, but using the right tools and components makes the difference between a clean setup and an electrical headache.
What You’ll Need:
- Push Button Start Kit: Go for a quality kit from a trusted brand like Watson’s StreetWorks. Cheap knockoffs lead to sketchy connections and electrical gremlins down the road.
Multimeter: Don’t guess. This is your best friend for identifying ignition wires. - Wire Strippers & Crimpers: Clean, solid connections are the key to a reliable install. No twisted-together, electrical-tape messes here.
- Heat Shrink Tubing & Electrical Tape: Keep connections insulated and secure.
- Soldering Iron & Solder (Optional but Recommended): If you want bulletproof connections, solder them instead of relying on crimp connectors.
- Inline Fuse (if not included in the kit): A 10A-15A fuse protects your ignition circuit from shorting out.
- Relay (If Required by the Kit): Some push start button installations need a relay to handle the current properly. Double-check your kit’s instructions.
- Zip Ties & Wire Loom: A clean install isn’t just about looks; proper wire management keeps things from shorting out or rubbing through.
Pro Tip: Don’t skimp on wiring quality. Use automotive-grade wire (16- to 12-gauge, depending on the circuit) to ensure solid conductivity and avoid voltage drops. If your push button start acts finicky, cheap wiring is often the culprit.
Step 2: Disconnect the Battery (Unless You Like Sparks)
Before you go poking around in your car’s wiring, disconnect the battery. This isn’t optional—it’s the difference between a clean install and an unplanned fireworks show under your dash.
How to Do It Right:
- Find the battery: Usually in the engine bay, sometimes in the trunk for custom builds.
- Disconnect the negative (-) terminal first: Always remove the ground first to break the circuit safely.
- Disconnect the positive (+) terminal next: If you’re working deep in the electrical system, it’s best to fully isolate the battery.
Pro Tip: If your car has an aftermarket radio or ECU, some systems may reset when you disconnect the battery.
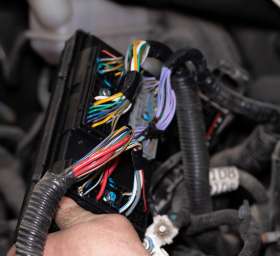
Step 3: Find Your Ignition Wiring
Now that your battery is disconnected, it’s time to hunt down the ignition wiring. If you get this part wrong, your car won’t start, won’t stay running, or might fry something expensive. Let’s do it right.
Your ignition switch wiring is typically under the dash near the steering column. If your ride has an aftermarket ignition system (MSD, Holley, etc.), your wiring might be routed differently—check the manual before tearing things apart.
Using a multimeter, test and label the following wires:
- 12V Constant Power: Always hot, even when the key is off. This feeds power to your push button start kit.
- Ignition Wire (RUN): Hot only when the key is in the run position. This powers the ignition system and fuel pump.
- Starter Wire (CRANK): Only hot when cranking. This triggers the starter motor when you press the push button.
- Accessory Wire: Powers things like the radio and gauges when in ACC mode.
Pro Tip: Label everything. Nothing sucks more than forgetting which wire is which after you’ve cut into the harness.
Step 4: Mount the Push Start Button
Now that you’ve mapped out the wiring, it’s time to pick the perfect spot for your push start button. This isn’t just about convenience—it’s about making sure it looks like it belongs there, not like a rushed afterthought.
Where to Mount It
The best spot depends on your dash layout and driving style, but here are some solid options:
- Dash Panel: Classic location, easy to reach, and looks factory if done right.
- Center Console: Works great if you want a modern, race-inspired setup.
- Hidden Location: Some builders tuck the button under the dash or inside the glovebox for a clean, stealthy look.
Pro Tip: Avoid placing the button where you might accidentally bump it—like too close to a shifter, cupholder, or elbow rest.
Step 5. Wire the Push Start Button
Now for the part that actually makes things happen—wiring up your push start button. Get this right, and your engine will fire up instantly with a press. Get it wrong, and you’ll either be chasing gremlins or dealing with a no-start situation.
1. Power the Button
Connect the power wire on the push button to a 12V constant power source. Use an inline fuse (10A-15A) to protect the circuit from shorts.
2. Connect to the Starter
Find the starter solenoid wire you identified earlier. Run a wire from the push button’s output terminal to this starter wire. Some push-button kits require a relay to handle the current.
3. Keep the Ignition System Powered (If Needed)
Some setups require a separate ignition power circuit. If your push button only cranks but doesn’t keep the engine running, you may need to wire in a second relay to keep the ignition powered. Alternatively, if your kit integrates with the existing ignition switch, you might not need this step.
4. Secure and Insulate All Connections
Use heat shrink tubing or quality electrical tape—don’t rely on loose connections. Keep wiring neat and away from heat sources (headers, engine block, etc.).
Pro Tips for a Bulletproof Setup
- Use soldered connections where possible—crimps alone can loosen over time.
- Test everything BEFORE finalizing the wiring—nothing’s worse than buttoning up your dash only to find out something isn’t working.
- If using a relay, mount it securely—a loose relay bouncing around can cause intermittent starting issues.
Step 6: Wire the Ignition Circuit (So It Actually Runs)
At this point, your push button start should crank the engine—but if you stop here, the engine might not stay running. That’s because the ignition system still needs constant power when the button is pressed.
Here’s how to make sure your ignition stays live, so your engine keeps running after startup.
Option 1: Using the Existing Ignition Switch (Easiest Method)
If you still want to use your key, the simplest way to handle ignition power is to turn the key to the “Run” position before pressing the push button. This method works but isn’t a fully keyless setup.
- The key in the “Run” position keeps power flowing to the ignition system, fuel pump, and accessories.
- Pressing the push button will then crank the engine without interrupting power.
- The Downside: You still need the key, which might not be ideal if you’re aiming for a fully modernized ignition setup.
Option 2: Wiring a Relay to Power the Ignition (Full Keyless Setup)
For a truly keyless push start button installation, you’ll need to bypass the ignition switch and wire in a relay. This allows the push button to both crank the engine and keep the ignition powered without a key.
To wire the relay for ignition power, follow this setup:
- Pin 30: Connect to 12V constant power (fused).
- Pin 85: Connect to ground.
- Pin 86: Connect to the push button output (so the relay activates when pressed).
- Pin 87: Connect to the ignition wire (RUN position).
Pressing the button cranks the starter AND keeps power flowing to the ignition system until it is manually shut off.
Option 3: Using an Ignition Control Module
Some high-end push button start kits (like Watson’s StreetWorks) include an integrated ignition control module, which simplifies the process. If your kit comes with one, follow the included instructions, as the wiring setup may differ slightly.
Pro Tip: If you’re running an aftermarket ECU or fuel injection system, check if it has a specific trigger wire for push-button ignition. Some systems require a separate switched power source to keep running after startup.
Step 7: Add a Hidden Kill Switch (Because Theft Sucks)
Now that your push button start is wired up and working, there’s one more thing to consider: security. A push-button system makes starting your car stupidly easy—which is great for you, but also great for someone looking to drive off with your ride.
The fix? A hidden kill switch. This simple addition ensures that even if someone presses the button, nothing happens unless they know where to flip the switch first.
How to Install a Kill Switch
There are a few ways to wire a kill switch, depending on how much security you want. Here are three solid options:
Option 1: Kill Power to the Push Button Start
The simplest method is to interrupt the 12V power source to the push button with a switch hidden somewhere inside the car.
- Wire a toggle switch in-line with the push button’s power feed.
- Hide it under the dash, in the glove box, or inside a console compartment.
- When flipped off, the push button gets no power, meaning the car won’t even crank.
Option 2: Interrupt the Ignition Circuit
For more security, cut power to the ignition system so the engine cranks but won’t fire.
- Wire the switch in-line with the ignition circuit relay (from Step 6).
- When off, the ignition coil or ECU gets no power, so even if someone cranks the starter, the engine won’t run.
This method works great if you want to prank your buddies—let them hit the button all day with no result.
Option 3: Disable the Fuel Pump
If you want the most secure setup, wire your kill switch to cut power to the fuel pump.
- Install the switch between the fuel pump relay and its 12V power source.
- Flip the switch off, and the pump won’t prime, meaning no fuel, no start.
- Great for EFI setups or any high-performance build where fuel delivery is critical.
Where to Hide the Switch?
The key to an effective kill switch is placement. You want it somewhere you can access quickly, but where a thief wouldn’t think to look.
- Under the dash: Classic spot, but keep it tucked away.
- Inside the glovebox: Easy to access but hidden from sight.
- Behind an ashtray or switch panel: Bonus points for creativity.
- Inside a center console compartment: If your ride has one, this is a clean install.
Pro Tip: For extra stealth, use a switch that blends in with your other controls—a fake rear defrost switch, headlight dimmer, or even a magnet-activated reed switch behind a panel.
Step 8: Take It for a Test Drive
Now that your push button start kit is fully wired and secured, it’s time for the moment of truth—firing up the engine and taking it on the street. Start the car a few times, check for any electrical gremlins, and make sure all accessories are functioning normally.
If everything fires up flawlessly every time, congrats—you just modernized your ride without adding unnecessary complexity.
Upgrade Your Ride with a Push Button Start Kit from Watson’s StreetWorks
If you’re serious about modernizing your street rod, a push button start kit is the perfect upgrade—sleek, reliable, and built for performance. At Watson’s StreetWorks, we don’t do gimmicks—just quality components engineered for real hot rodders. Our kits are built to last, easy to install, and designed with street rod and custom builders in mind.
Ditch the old-school key hassle and step up to effortless starts with the press of a button. Get yours today and fire up your ride the right way!
Frequently Asked Questions: How to Install a Push Button Start Kit
If you’d like to learn more about how to install or wire a push button start kit, check out the answers to our most frequently asked questions on the topic down below.
Will a push button start kit work with a carbureted engine?
Absolutely. A push button start doesn’t change how the engine runs, only how it cranks. If you have a carbureted engine, you’ll still need to manually set the choke (if applicable) and pump the throttle before starting. For better control, some builders wire the ignition and starter circuits separately, so they can power up the ignition before cranking.
Can I install a push start button on a vehicle with a manual transmission?
Yes, but you need to be extra careful with safety precautions. If your car has a neutral safety switch, you must wire the push button start so it only engages when the clutch is pressed (or the transmission is in neutral). Otherwise, you risk accidentally starting the car in gear, which can be dangerous.
Can I use a remote start system with a push button start kit?
Yes, but it requires additional wiring. A remote start module must be integrated into both the ignition and starter circuits so it can mimic the push button’s function. Many modern remote start systems also include security features, such as a key fob that must be present before the vehicle will run.