
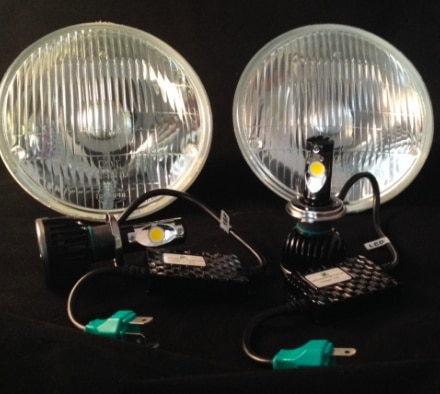
Guide to Historically Accurate Hot Rod Lights
Guide to Historically Accurate Hot Rod Lights: How to Get Modern Visibility With a Vintage Look
There’s a particular kind of satisfaction that comes from rolling a finished hot rod out of the garage and knowing every detail is right: the stance, the paint, the chrome, and the lights. Lighting is one of those details that separates a build that looks researched from one that just looks thrown together. Get it right, and the whole car reads like it belongs to its era. Get it wrong, and even a flawless body job can feel off.
The good news is that historically accurate hot rod lights and functional visibility can coexist in the same housing. This guide covers how to make the upgrade to period-accurate hot rod lights without compromising your build’s integrity.
Let’s get started.
Watson’s Streetworks
Article Contents
What “Period Accurate” Actually Means for Hot Rod Lighting
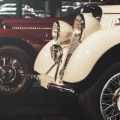
Historically accurate hot rod lights are less about using original parts and more about understanding the visual language of the era. Pre-war and early post-war hot rods relied on simple, unadorned fixtures: sealed-beam headlights in 7″ round housings, small bullet or teardrop taillights, and minimal chrome trim. Later builds from the ’50s and early ’60s introduced more swept styling but kept the same basic forms.
The shapes, proportions, and lens colors defined the look.
What makes a light look “wrong” on a period build is usually one of four things:
- A housing that’s too contemporary in form
- A lens with too much plastic sheen
- A light output that’s too clinical and white, rather than warm
- A bulb that’s visible through the lens and gives away the modern source
Keeping all four in check is the real challenge of the period-correct lighting upgrade.
For the functional side of a hot rod, you’re typically dealing with headlights, taillights that double as brake lights, and classic car turn signals, each of which has its own set of considerations.
The LED Case: Why Modern Bulbs Belong in Vintage Housings
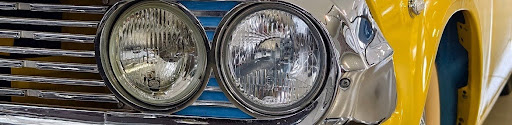
The resistance to LED upgrades in classic car circles often comes from early LED products that were genuinely bad: blue-tinted output, visible point sources, poor beam patterns. That era is over. Current LEDs designed for automotive use produce warm color temperatures, controlled beam geometry, and output that works correctly with vintage reflector housings.
The functional advantages are real. LEDs respond to a switched circuit almost instantaneously, meaning your brake lights illuminate a fraction of a second faster than incandescent bulbs, a meaningful difference at highway speeds. They also last far longer and draw significantly less current, which matters for older charging systems that were never designed to support modern accessory loads.
How to Apply This to Your Build
The 1157 bulb is the dominant standard in vintage tail and signal housings. Watson’s StreetWorks carries the 1157 LED Bulb Kit with Flasher (EL-1157KIT) specifically for this application.
It’s a direct replacement that fits the original socket, produces the correct dual-intensity output for combined brake/tail function, and includes the flasher module needed for proper turn signal operation with the lower current draw of LEDs.
Candela vs. Lumens: Understanding What Matters for Visibility
This is where a lot of builders get tripped up. When comparing hot rod lights or any automotive lighting, the distinction between candela and lumens is critical and often poorly explained.
- Lumens (Total Output in All Directions): Lumens measure total light output: the amount of light a source produces in all directions combined. A high lumen count doesn’t mean the light goes where you need it; it means the source generates a lot of light in aggregate.
- Candela (Intensity at the Target): Candela measures intensity in a specific direction: how bright the light appears at a given point along its beam. For a flashlight or a headlight, candela is what actually determines how well you can see (or be seen).
A bulb with high lumens but poor beam control can scatter its output in directions that do nothing useful, while a lower-lumen bulb with focused optics can produce far more usable light at the target distance.
How to Apply This to Your Build
For taillights and brake lights, the relevant metric is how visible you are to the driver behind you. An LED array with moderate lumens but high forward candela will outperform a high-lumen incandescent in this context. For headlights, the beam pattern determines whether you’re illuminating the road or just generating glare. This is why a drop-in LED headlight (like our LED Headlights (251##) performs better than a generic LED bulb crammed into a vintage reflector housing: the optics are designed together.
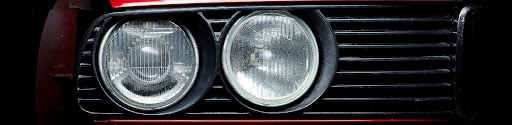
Lens Texture and Diffusion: The Detail That Sells the Era
Nothing gives away a modern lighting conversion faster than the wrong lens. Original lenses from the ’40s through ’60s used pressed glass or early acrylic with distinctive surface textures: stepped Fresnel patterns, ribbed diffusers, prismatic segments. They controlled light distribution, spread the output across the lens face, and produced a warm, organic glow rather than a sharp point source.
Why Lens Texture and Diffusion Matter
Lens texture and lens diffusion are the variables that determine whether a light looks period correct or jarringly contemporary.
A smooth, clear acrylic dome over an LED array will show the individual LED chips and catch light in a way that reads as modern regardless of the housing shape. The right lens texture breaks up the source, creates the soft spread that the original glass produced, and makes the light look like it belongs.
How to Apply This to Your Build
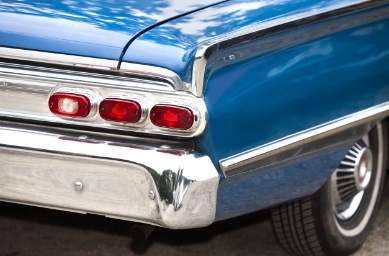
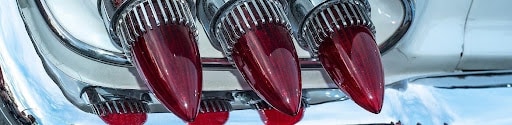
When evaluating components for a period build, look for lenses with ribbed or stepped patterns on the inner surface rather than smooth backs. Amber lenses for signals should use tinted material throughout rather than a clear lens with an amber bulb. For taillights, a deep red lens with internal ribs produces the saturated, diffused output that vintage taillights are known for.
Watson’s L58 series lights, including the Double-D LED Taillights (L58-DDR) and the Small (7-1/2″) Red Hot Slot LED Light Kit (L58SM), are designed with this in mind, producing diffused output through red lenses in compact housings that fit naturally into custom tail sections.
Classic Car Turn Signals: Making Them Work and Making Them Legal
Classic car turn signals present a specific challenge. Original systems used single-filament amber bulbs in separate housings, or relied on the same red tail lens to serve as a combined tail, brake, and signal. Neither approach plays perfectly with modern LED drop-ins without some additional thought.
The core issue is flash rate: LED turn signal bulbs draw so much less current than incandescents that a standard thermal flasher will either hyper-flash (flash too fast) or not flash at all. The solution is either an electronic flasher rated for LED loads or a resistor installed in the circuit to simulate the original current draw.
How to Apply This to Your Build
For builders doing separate amber signals, our small LED Indicator Lights (L18) work well as period-appropriate dash indicators and can pair with exterior signal assemblies. They’re compact, low-draw, and available in amber.
Retrofitting LEDs Into Vintage Housings
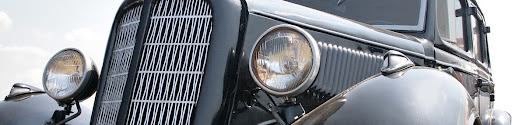
The most common scenario for a period build is using original or reproduction vintage housings with modern bulbs inside. The process is straightforward for common sockets like the 1157, but there are a few things to verify before you commit.
First, confirm the socket type. 1157 is the most common dual-filament standard in American cars from the late ’50s onward, but earlier vehicles used bayonet bases with different pin spacing. A direct LED replacement will only work if the base matches precisely.
Second, check polarity. LEDs are polarity-sensitive; incandescents are not. Most automotive LED bulbs are designed to work in either orientation or include a note about which way to insert them, but it’s worth confirming before you button everything up.
Third, assess the reflector. Vintage housings with original chrome reflectors often work beautifully with LED replacements because the reflector geometry was designed for a similar focal point to a modern base. Pitted or corroded reflectors will scatter output and reduce the effectiveness of any bulb.
For complete light assemblies, our Rodders Light Upgrade Package (EL-RLP) covers headlights, taillights, and backup lights in a coordinated set. It’s a practical way to address the whole car in a single order rather than sourcing components individually.
Light Your Classic Build With Period-Correct Style
Watson’s StreetWorks carries over 75 hot rod lighting products across exterior and interior categories, from complete upgrade packages to individual bulbs and replacement lenses. Whether you’re fitting a set of period taillights or working out the signal system on a scratch build, you’ll find the hot rod lights you need at Watson’s.
Questions about specific applications are welcome; the team at Watson’s can be reached at tech@watsons-streetworks.com or 1-866-859-0513.
Frequently Asked Questions About Historically Accurate Hot Rod Lights
Are there legal restrictions on retrofitting LED lights into vintage housings on classic cars?
Regulations vary by state, and classic or antique vehicle registration often involves different standards than late-model registration. In most states, a registered antique or street rod is subject to minimum performance requirements (e.g., functioning brake lights and turn signals visible from a set distance) rather than the more specific SAE/DOT standards that apply to new vehicles. That said, any lighting system on a road-driven vehicle should be functional and visible. Replacing an incandescent with an equivalent-function LED generally does not create a compliance issue, but if you’re uncertain about your state’s rules, checking with your local DMV or a rod association is the cleanest way to confirm.
Do modern LED lamps draw less power than vintage incandescent bulbs, and why is that useful?
Yes, significantly less. A standard 1157 incandescent draws approximately 8 watts on the tail filament and 27 watts on the brake/turn filament: up to 35 watts combined when both are active. An equivalent LED draws 5 to 8 watts for comparable or greater output. On a classic car with a 6-volt electrical system or a generator-based charging setup, this matters. Original systems were sized for the loads of their era. Adding modern accessories, such as stereos, fans, and electric fuel pumps, puts pressure on a charging system that was never designed for them. Reducing lighting load frees up headroom in the electrical system and reduces heat in the wiring harness, particularly around the turn signal and brake light circuits that see the most switching activity.
What should I look for in lens materials or textures when maintaining a period look but improving brightness?
The two qualities that matter most are color saturation and surface treatment. For a period-correct taillight, a deep red lens made from tinted material (rather than a clear lens with a colored bulb) produces the richest, most vintage-accurate appearance. For the surface texture, look for ribbed or prismatic patterns on the inner face of the lens: this creates the diffusion that spreads LED output evenly across the lens face and hides the individual light sources. Flat, smooth inner surfaces tend to show hot spots. Avoid high-gloss acrylic with a modern sheen; it reads as contemporary regardless of the housing it’s in.